If you’re tired of a cluttered workspace and expensive organizational tools, we have the perfect solution for you. Crafting your very own office organizers using cardboard is not only budget-friendly but also an incredibly fun and creative activity! Whether you’re a crafty mom looking for a weekend activity, a party decorator wanting to keep supplies in check, or an eco-conscious enthusiast seeking sustainable storage options—this guide is tailored for you.
Throughout this blog, you’ll learn how to turn cardboard (something almost everyone has at home!) into stylish, functional pieces for your office. We’ll walk you through step-by-step instructions, share tips to personalize your designs, and show how you can match them to your decor while doing good for the planet.
Perhaps the best part? These DIY office organizers are entirely customizable—your creativity sets the limit!
Why Use Cardboard for DIY Office Organizers?
Before we jump into the how-tos, let’s explore why cardboard is an excellent choice for crafting office organizers.
1. Affordable and Accessible
Cardboard is one of the most commonly available materials around us. Whether your pantry is stocked with cereal boxes or your online purchases come in shipping containers, cardboard is likely hiding in plain sight, ready for its makeover.
2. Eco-Friendly Solution
Repurposing cardboard into organizers prevents unnecessary waste and gives this recyclable material a second life. It’s an ideal choice for eco-conscious individuals who want stylish solutions without increasing landfill waste.
3. Customizable and Lightweight
With cardboard, the possibilities are endless! Cut, glue, decorate, paint, and wrap it however you please. It’s lightweight, yet surprisingly sturdy depending on the thickness and reinforcement techniques applied.
4. Fun and Family-Friendly Project
This is the perfect DIY project to involve kids, friends, or anyone who loves crafting. Plus, creating something functional together reinforces creativity and teamwork!
Essential Materials and Tools
The first step to getting started is ensuring you have all the necessary materials and tools. Here’s a checklist to kick off your project effectively.
Basic Materials
- Cardboard (shipping boxes, cereal boxes, corrugated cardboard work great!)
- Glue (hot glue is ideal for stronger adhesion)
- Scissors or a cutting knife
- Ruler and pencil for measurements
- Decorative paper, fabric, or paint (for finishing touches)
- Double-sided tape (optional)
- Reinforcement materials (popsicle sticks or small dowels, if needed)
Optional Add-ons
- Stickers or washi tape for decoration
- Labels for organizing compartments
- Spray adhesive for a professional-looking finish
Now that you’re equipped, it’s time to learn how to make stunning office organizers!
5 Creative DIY Office Organizer Ideas
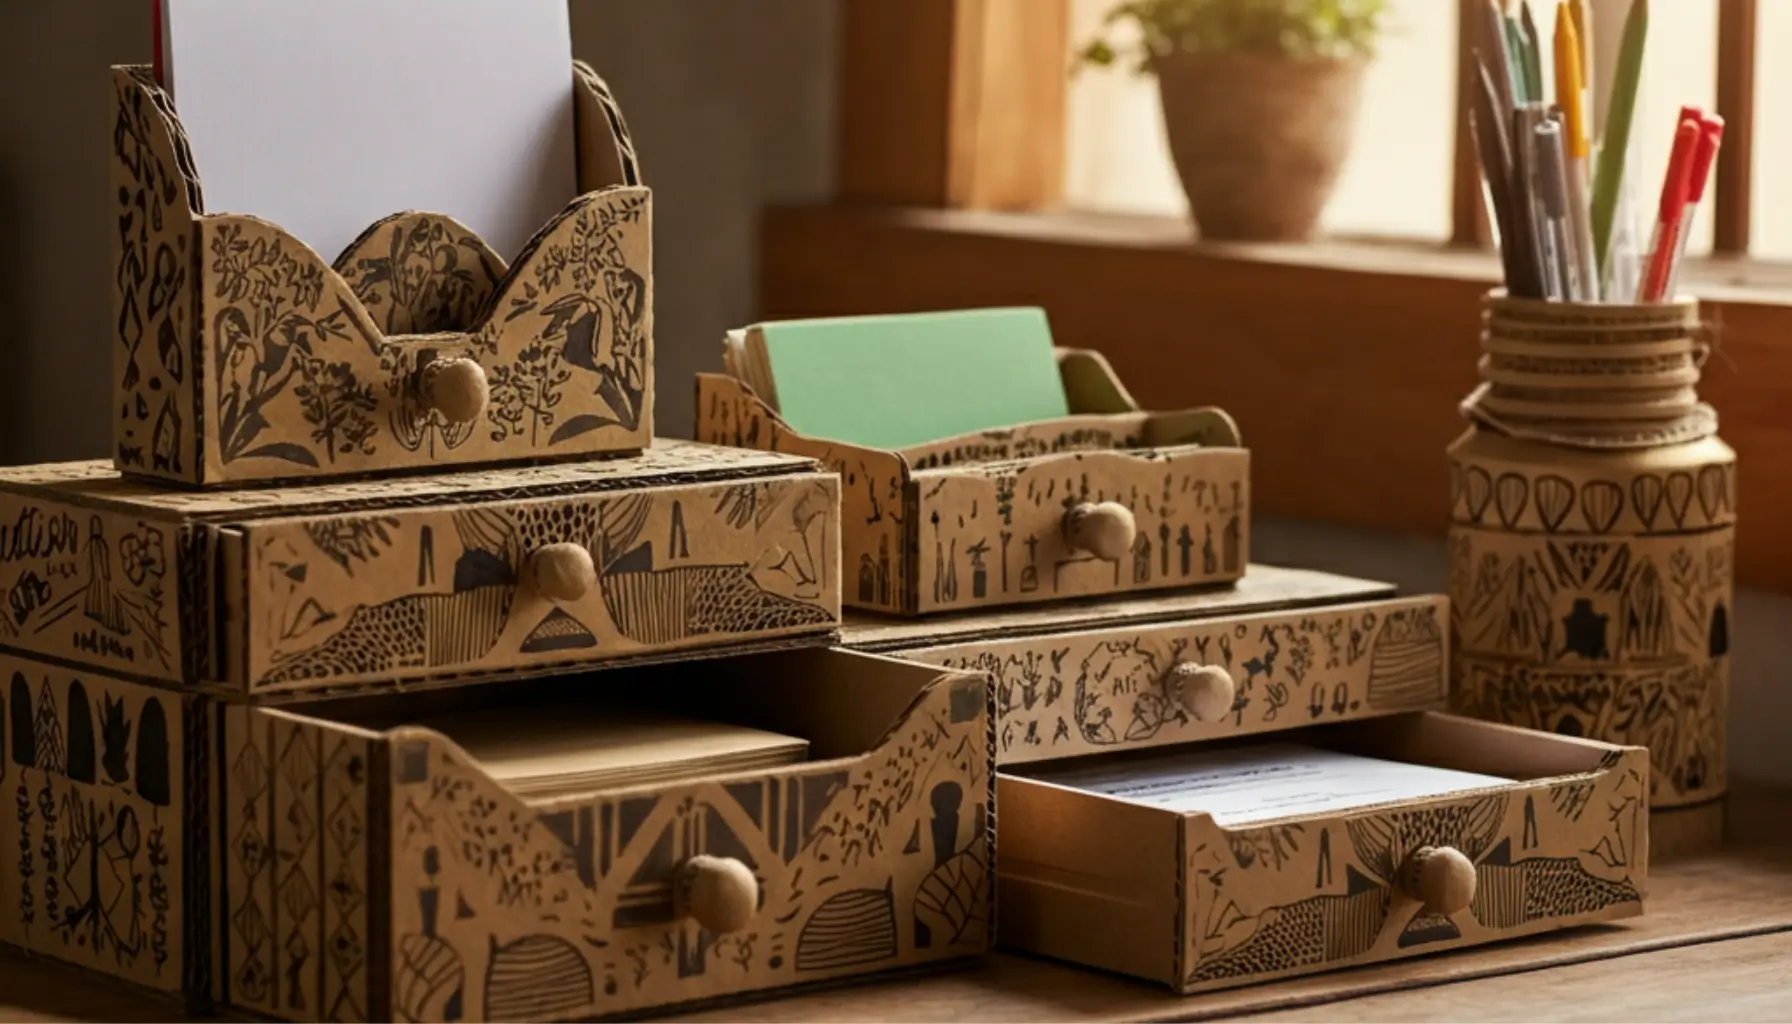
1. Desk Drawer Dividers
A cluttered desk drawer is the enemy of productivity. But you can fix this issue with a simple set of cardboard dividers!
How to Make It
- Measure the Drawer
Carefully measure the inner dimensions of your drawer. Use the ruler and pencil to mark the cardboard accordingly.
- Cut Cardboard Strips
Cut enough strips of cardboard to create compartments. Use corrugated cardboard for added durability.
- Create Slots for Fitting
Make small cuts halfway through each strip so they can interlock and stand upright.
- Decorate and Assemble
Cover the pieces with decorative paper or leave the raw cardboard for a rustic touch. Once ready, assemble them into the drawer!
Perfect for separating pens, staples, sticky notes, and other daily essentials with ease.
2. Magazine Holders
Tired of old magazines stacking up, yet unsure where to store them? Cardboard magazine holders are a professional and beautiful solution.
How to Make It
- Repurpose a Cereal Box
Angle-cut the top half of a cereal box diagonally, leaving the back intact for height.
- Reinforce and Wrap
Use tape or additional cardboard to enhance sturdiness. Complete the look with colorful fabric or paper.
- Label for Easy Access
Add labels using stickers or ready-made tags to identify your magazines.
You’ll quickly notice how streamlined and neat your reading corner becomes!
3. Pen and Accessory Holders
An easy project for beginners, pen holders or mini trays are simple yet functional touches for office organization.
How to Make It
- Cut and Shape Base Boxes
Using smaller cardboard scraps, shape multiple boxes to store pens, highlighters, or even paper clips.
- Reinforce With Dowels
Insert wooden dowels along the edges of the organizers to improve durability.
- Customize as Desired
Paint them in bold colors, wrap them in patterned washi tape or layer them asymmetrically—your choice!
These neatly gather your scattered desk accessories while adding a playful element to your desk.
4. File Folders or Letter Organizers
Looking for a way to manage paper chaos? Create a file tray organizer with unique sections to house documents.
How to Make It
- Shape Layered Trays
Design and cut rows of ascending cardboard trays. Craft support structures beneath for each level.
- Glue and Align Trays
Attach the trays together securely with glue and patience, ensuring proper alignment.
- Personalize and Label
Give it a sleek finish with metallic paper or paint. Label folders so you’ll always know where to find important files.
5. Wall-Mounted Organizers
For small offices with limited desk space, wall-mounted organizers are lifesavers.
How to Make It
- Design Vertical Compartments
Use sturdy cardboard to design slim compartments. Boomerang-style or stacked tiers work well!
- Attach with Hooks
Reinforce the back of the organizer with extra cardboard, then attach securely to hooks, nails, or adhesive strips on your wall.
- Decorate for Style
Add faux greenery or use vibrant paints to turn the board itself into wall art!
Tips to Elevate Your DIY Organizers
While crafting your organizers, follow these extra tips to make them stand out even more!
- Experiment with Textures
Combine cardboard with jute, velvet, or even faux leather for a polished appearance.
- Go Monochrome
Stick to one color palette to create a clean and professional look that complements your space.
- Use Stencils for Patterns
If painting or decorating feels daunting, use geometric stencils to create trendy patterns effortlessly.
- Bundle Components
Attach all your small organizers together to create one cohesive desk station!
Transform Your Workspace with Style
Don’t overlook the humble cardboard! With a little time, creativity, and the techniques shared above, you can declutter your workspace, save money, and give cardboard a second life. Whether it’s a pen holder, a wall-mounted file system, or tailored drawer dividers, these DIY organizers prove you don’t need to overspend for efficiency and beauty.
Got inspired? Share your first cardboard project with us in the comments or tag us on social media—we’d love to feature your creations!